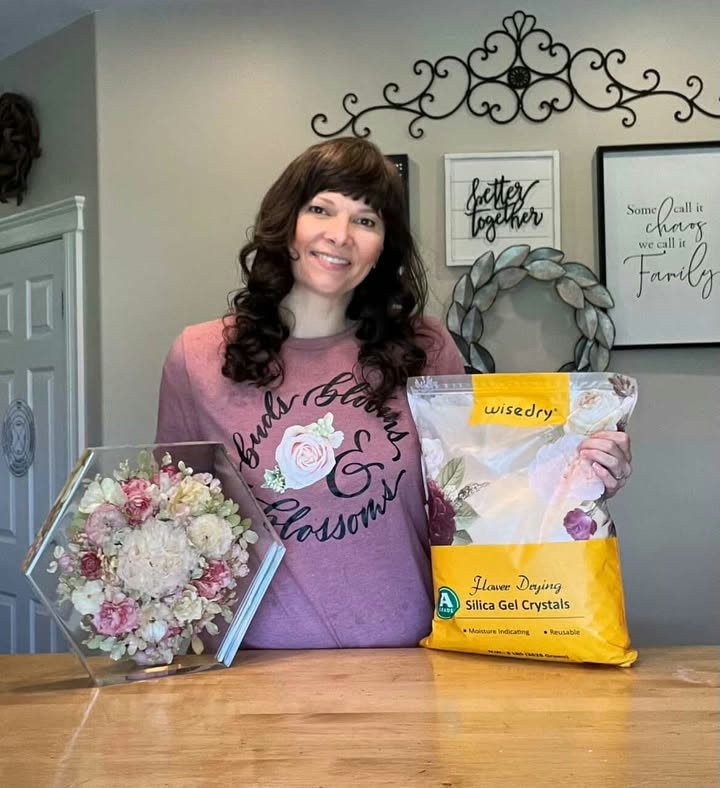
Silica gel can preserve a flower’s three-dimensional shape more effectively than air-drying, but there is no single timer that works for every bloom. A small daisy, a dense rose, and a moisture-rich flower head do not release water at the same rate. Container seal quality, room conditions, petal thickness, and how the flower was prepared also affect the process.
The most useful answer is therefore not “wait exactly X days.” It is to combine the expected range in your product instructions with a careful physical check of one accessible bloom.
Quick answer
A flower is generally ready to remove from silica gel when its petals feel dry and papery rather than cool or soft, the flower head holds its shape without looking damp, and the thicker areas near the petal base no longer feel flexible from retained moisture. Check gently and in stages. If the center or thickest part still feels cool, soft, or moist, cover the flower again and allow more time.
Do not use color alone as the deciding signal. Some flowers naturally darken, lighten, or change tone while drying, and indicating crystals mainly tell you about the desiccant—not whether every part of a bloom is ready.
Why drying time varies from flower to flower
A drying estimate is a starting point, not a guarantee. Several variables change how quickly moisture can move out of the flower:
- Flower density: A tightly layered rose or peony can retain moisture near its center after the outer petals feel dry.
- Petal thickness: Thick or waxy petals usually need a more cautious check than thin, open petals.
- Flower size: Large heads contain more material and may dry less evenly than small blooms.
- Starting condition: Recently watered, rain-wet, or very fresh flowers may carry more moisture at the start.
- Stem and center thickness: The receptacle, calyx, and short remaining stem can stay flexible longer than exposed petal edges.
- Silica gel placement: Crystals must surround and support the bloom without leaving large air pockets.
- Container seal: Frequent opening or a loose lid lets room humidity enter and makes timing less predictable.
- Desiccant condition: Silica gel that began the project already moisture-loaded has less capacity available for the flower.
For product-specific setup and starting guidance, follow the Wisedry flower drying crystals instructions before relying on a general article.
Five signs to check before removing the flower
1. The exposed petal edge feels dry, not cool
Use clean, dry hands and touch only an accessible outer edge. A dry petal usually feels lightweight and papery. A petal that feels cool, soft, or slightly heavy may still hold moisture.
Temperature is only a supporting clue. A cool room can make everything feel cool, so compare the bloom with the container and tools around it rather than judging from one brief touch.
2. The petal holds its shape with very light contact
A ready petal should keep its formed curve when touched gently. It should not feel fleshy or fold as if it were fresh. At the same time, dried petals can be brittle, so this is not a squeeze test. Pressing, bending, or repeatedly handling the bloom can damage the shape you are trying to preserve.
3. The center and thick petal bases do not feel soft
Outer edges dry first. The better checkpoint is often the flower’s thickest accessible area: near the petal base, the calyx, or the center of a layered bloom. If that area still feels soft or damp, the flower is not ready just because the edges feel crisp.
Do not pull petals apart to inspect a hidden center. Instead, uncover only enough of the bloom to reach a natural edge or an accessible thick area.
4. There is no visible surface dampness
Look for glossy wet spots, translucent-looking tissue, or crystals clinging because of visible moisture. A dry bloom should not look wet. However, a matte surface by itself does not prove that the interior is dry, especially on a dense flower.
5. The bloom passes a careful partial-uncover check
A controlled test is more reliable than repeatedly opening the whole project. Clear a small amount of silica gel from one side of an accessible bloom. Support the flower and inspect an outer petal plus one thicker area. If both feel dry and structurally stable, continue uncovering gradually. If either feels soft or moist, return the crystals gently and close the container again.
A low-disturbance checking method
Opening the container too often can introduce humid air and disturb fragile petals. Use this sequence when the expected drying window is near:
- Prepare the work area first. Set up a clean, dry tray, soft brush, and a place for recovered crystals. The clean-tray setup guide explains a simple layout.
- Open the container only when ready. Avoid leaving the lid off while gathering tools.
- Choose the easiest bloom to inspect. If several flowers are in one container, start with one that can be reached without shifting the others.
- Remove crystals from one side gradually. Do not pull the flower straight out of a full bed of silica gel.
- Support the flower from below. Keep pressure away from exposed petals.
- Check an outer edge and a thicker area. Look for the dry, papery feel described above.
- Make one decision. Continue removal if the signs agree, or cover the flower and reseal the container if they do not.
This method reduces unnecessary handling while giving you more information than checking the calendar alone.
What to do if only part of the flower feels dry
Uneven drying is common in layered or mixed-size blooms. If the outer petals feel dry but the center remains soft, do not remove the flower permanently yet.
Gently return clean silica gel around the exposed area without pressing the petals, then reseal the container. The guide to pouring silica gel around petals can help you restore support without collapsing the bloom.
For a container holding different flower types, one bloom may be ready before another. Remove only the ready flower if you can do so without disturbing the rest. Otherwise, it can be safer to reseal and check again later than to force access through tightly packed flowers.
What not to use as the only test
A fixed number of days
A calendar reminder is useful for knowing when to begin checking, but it cannot account for flower thickness, starting moisture, or container conditions. Treat a time estimate as a checkpoint.
Petal color
Color change can happen for many reasons and varies by flower. A bloom may be dry even if its shade changed, or still hold moisture despite looking lighter. Judge texture and structure as well as appearance.
Indicating-crystal color
Color-indicating silica gel helps show the condition of the desiccant. It does not directly measure moisture inside the thickest part of a flower. Mixed crystal color can also reflect uneven moisture exposure inside the container.
A crisp outer edge
The exposed edge is usually the first part to dry. Always add a second check closer to a thick petal base or the center.
Repeated squeezing
Pressure can bruise a partially dried flower or crack a fully dried one. Use minimal contact and stop once you have enough information.
After the flower passes the dryness check
Removal is still part of the drying process, so work slowly:
- Pour or scoop away bulk silica gel before lifting the bloom.
- Support the flower head rather than pulling by a fragile stem.
- Use a soft brush or gentle air blower for crystals lodged between petals.
- Keep the work surface dry so recovered crystals do not pick up moisture.
- Move the finished flower to its intended dry storage or next project step promptly.
See how to remove silica gel from delicate flower petals for the detailed removal sequence. If you are still planning the whole process, the free Wisedry Flower Drying eBook provides a broader project guide.
A 30-second readiness checklist
Before fully uncovering the bloom, confirm:
- The expected product-guidance window has been reached.
- The outer petal edge feels dry and papery.
- An accessible thick area does not feel soft or damp.
- The flower holds its shape under very light contact.
- There is no visible surface moisture.
- You have a clean tray and gentle removal tools ready.
If the signs disagree, wait and check again rather than forcing a yes-or-no answer from one clue.
Frequently asked questions
Should dried flowers feel completely hard?
Not necessarily. Different species and petal structures finish with different textures. “Dry and papery” is a better general description than “hard.” Thick centers may feel firm, while thin petals can remain delicate and slightly flexible without feeling moist.
Can I check a flower without taking it all the way out?
Yes. A partial-uncover check is often the least disruptive approach. Clear one accessible side, support the bloom, and inspect an outer edge plus a thicker area. Cover and reseal it if those areas are not ready.
What if the outside is crisp but the center is soft?
The flower needs more time. Outer petals are exposed to the silica gel first and can dry before a dense center. Restore the crystals gently around the flower and reseal the container.
Does blue or orange indicating silica gel tell me the flower is dry?
It tells you about moisture loading in the indicating crystals, not the exact moisture level inside the flower. Use it as a desiccant-maintenance signal and combine it with a careful flower check.
Can flowers stay in silica gel too long?
Leaving a finished bloom longer than necessary may make delicate petals more brittle, but the practical threshold varies. Begin careful checks around the guidance supplied with your product and remove the flower once the readiness signs agree.
Check gently, then remove in stages
The safest practical decision comes from multiple clues: dry petal texture, a stable shape, no soft or damp thick areas, and a controlled partial-uncover test. That approach respects the differences between flower types and avoids promising that every bloom will finish on the same schedule.
Ready for the next step? Download the Wisedry Flower Drying eBook for a complete workflow, then use the delicate-petal removal guide when your bloom passes the check.