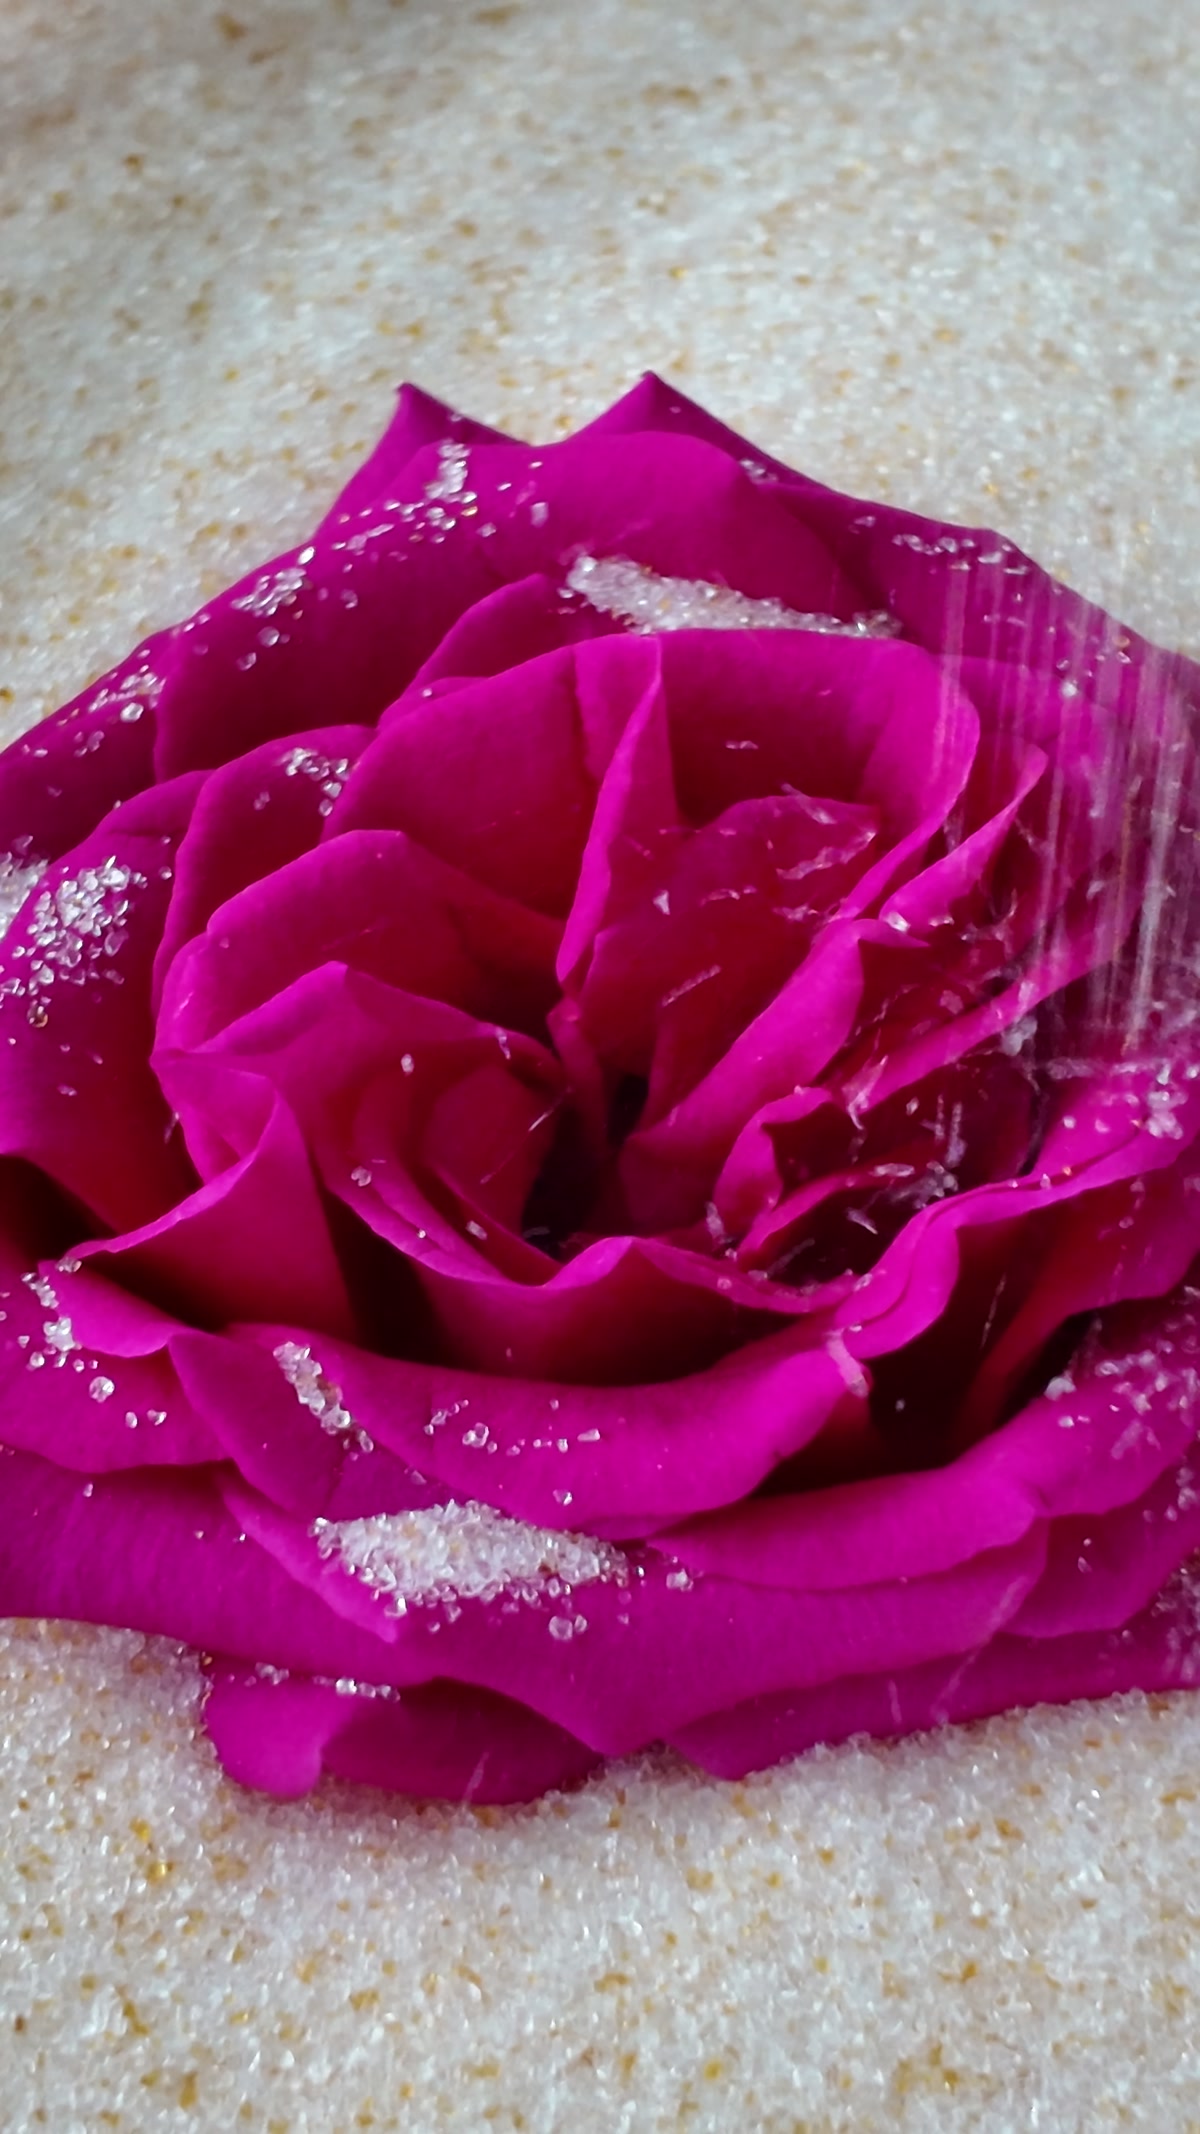
Pouring silica gel around flower petals is one of the most important steps in flower drying. The goal is not to bury the flower as quickly as possible. The goal is to let the crystals support the petals from below and the sides, then slowly fill open spaces so the bloom keeps its shape while moisture is drawn out.
The safest routine is simple: start with a stable silica gel base layer, place the flower gently, pour from the side or from an open gap, and add small amounts at a time. Avoid dumping crystals directly onto the center of the flower, because the weight of a heavy pour can fold soft petals, flatten the bloom, or leave unsupported pockets.
If you are still setting up the container, start with this related guide first: How Deep Should The Silica Gel Base Layer Be For Drying Flowers?
Quick Answer
To pour silica gel around flower petals without crushing them, keep the scoop low, aim at the spaces beside the flower instead of the center, and let the crystals rise gradually around the bloom. Pause often to check whether the petals are still open, supported, and not being pushed sideways. Use a spoon, small scoop, or folded paper chute for delicate flowers so the pour stays narrow and controlled.
Why The Pouring Step Matters
Loose silica gel crystals can reach between petals better than a flat sheet of material, but the crystals still have weight. A fast pour can push petals out of position before they have any support around them.
Good pouring does three things:
- It supports the flower before the top layer becomes heavy.
- It fills gaps between petals without forcing them closed.
- It keeps the bloom from rolling, leaning, or touching the container wall.
This is especially important for roses, ranunculus, peonies, dahlias, and other flowers with layered petals. Small filler flowers are usually more forgiving, but they can still shift if the crystals are dumped in from too high.
Start With A Stable Base Layer
Before you pour around the petals, the flower should already be resting on an even layer of silica gel. The base layer should be deep enough to support the bloom and stem end, but not so uneven that the flower tilts.
For a rose or similar bloom, check three things before adding more crystals:
- The flower sits upright or at the angle you want it to dry.
- The lowest petals are supported instead of hanging in the air.
- The flower is not pressed against the side of the container.
If the flower wobbles, add a little more silica gel beside the base of the bloom and adjust the angle before you start covering the petals.
Use A Low, Narrow Pour
Hold the scoop close to the container rather than high above it. A low pour is easier to control and reduces the impact on soft petals.
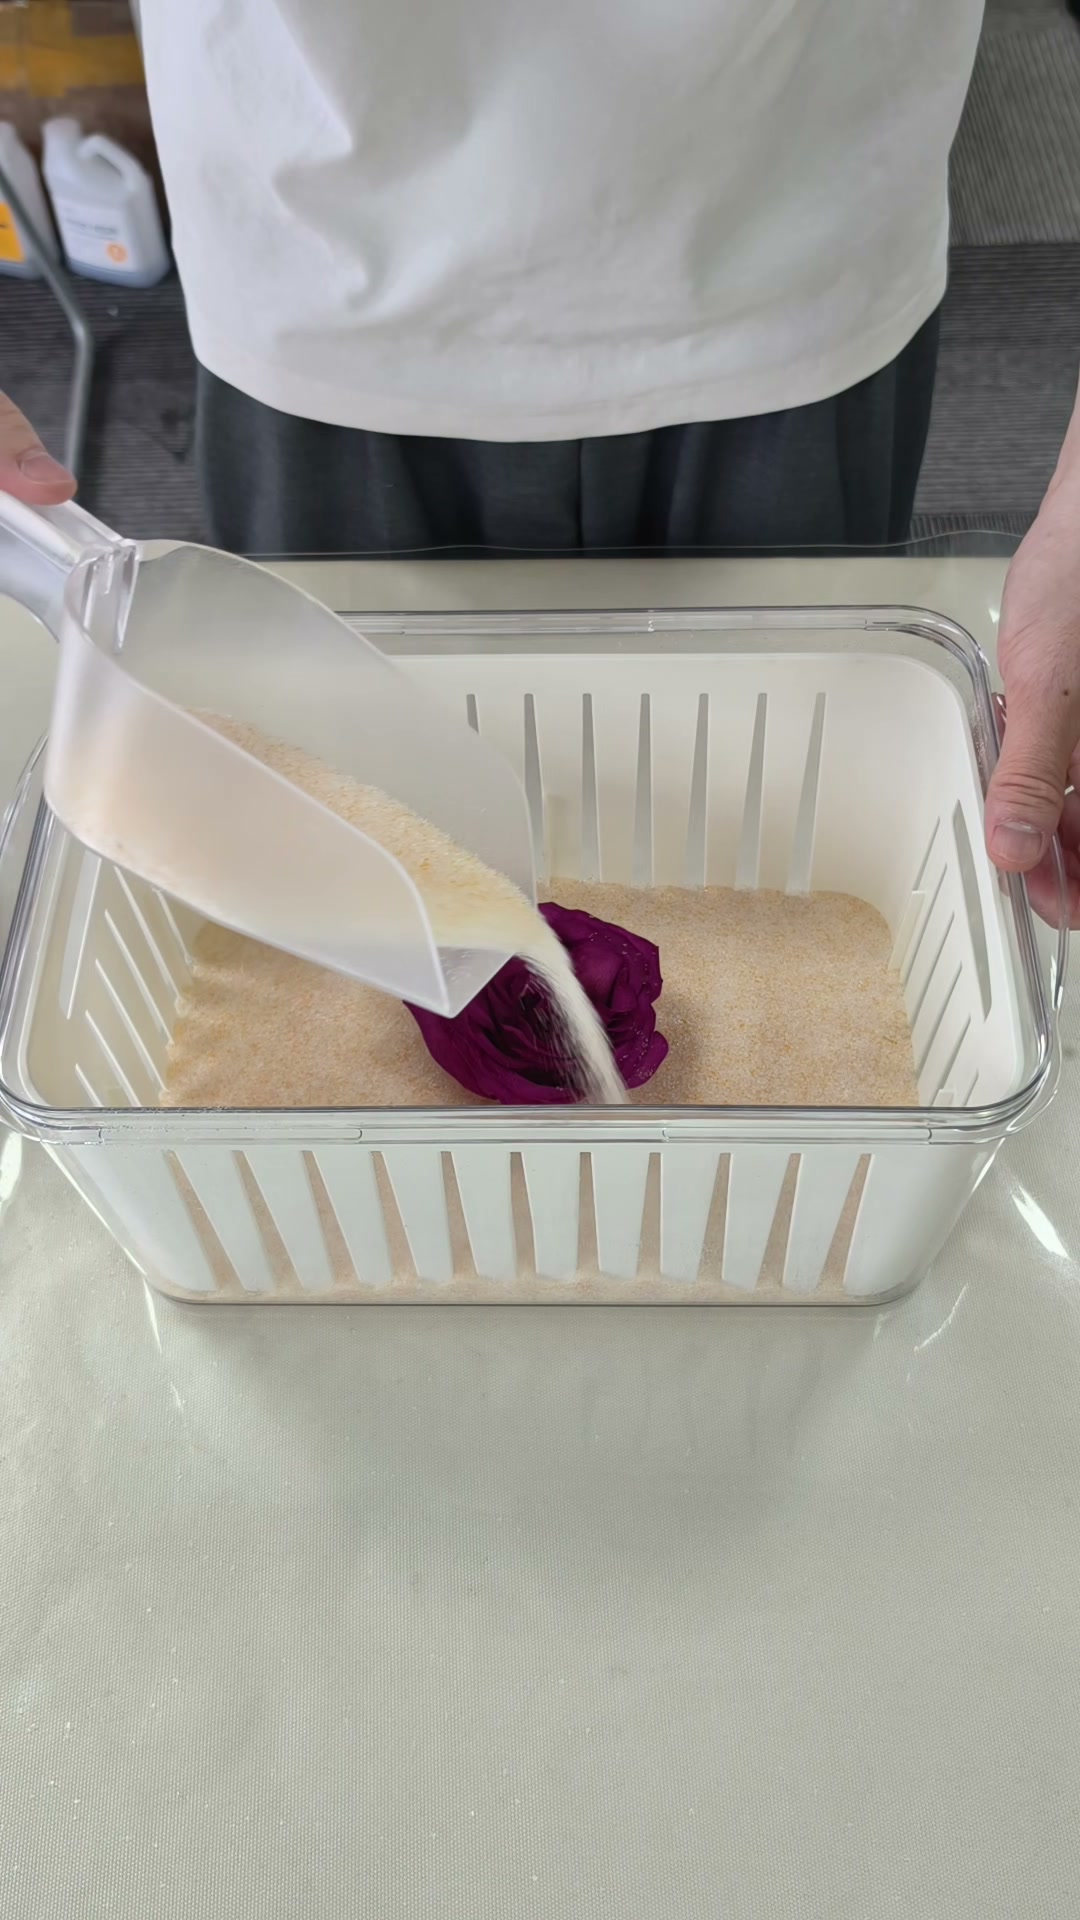
Aim the first pours at the open spaces around the flower:
- Beside the outer petals.
- Behind the bloom where the flower needs side support.
- Near the stem end if the flower is leaning.
- Into visible gaps between petal layers, only when the stream is very light.
Do not begin by pouring straight into the flower center. Fill around the outside first, then work inward after the bloom has more support.
Pour In Small Passes
Think of the process as several light passes instead of one full pour.
First pass: add silica gel around the outside of the flower until the lower petals feel supported.
Second pass: add a little more near the sides and back of the bloom, especially where petals are open or curved.
Third pass: let a fine stream fall into larger gaps between petals, using only enough crystals to hold the petal shape.
Final pass: cover the top gently after the petals are already supported from below and around the sides.
Between passes, stop and look at the flower from more than one angle. If a petal starts to fold, lean, or disappear under a heavy pile, slow down and redirect the next pour to an empty space beside it.
Use The Right Tool For The Flower
A wide scoop is useful for filling the container quickly, but it can be too much for the delicate part of the job. Switch tools as the silica gel gets close to the petals.
Good options include:
- A small scoop for steady side filling.
- A spoon for narrow gaps between petals.
- A folded piece of clean paper as a simple chute.
- A small cup with a pinched lip for a controlled stream.
The tool is less important than control. If the stream is too wide or too fast, use a smaller tool.
How To Fill Between Petals
For layered flowers, do not force silica gel into every tight space. Focus on the natural openings first.
Use this sequence:
- Fill around the outside of the bloom.
- Add silica gel near the base of open petals.
- Let a small stream fall into larger visible gaps.
- Pause when a gap is supported, not packed.
- Move to a different side before the same area becomes heavy.
The point is to support the petal shape, not to pry petals apart. If a flower is very tight, it may not need much silica gel inside the center at all. If it is very open, the center may need a slow, light fill so petals do not collapse inward.
What A Good Partial Cover Looks Like
A good partial cover still lets you see the flower shape. The outer petals should be supported by silica gel, but they should not look buried under a steep mound while other sides are still empty.
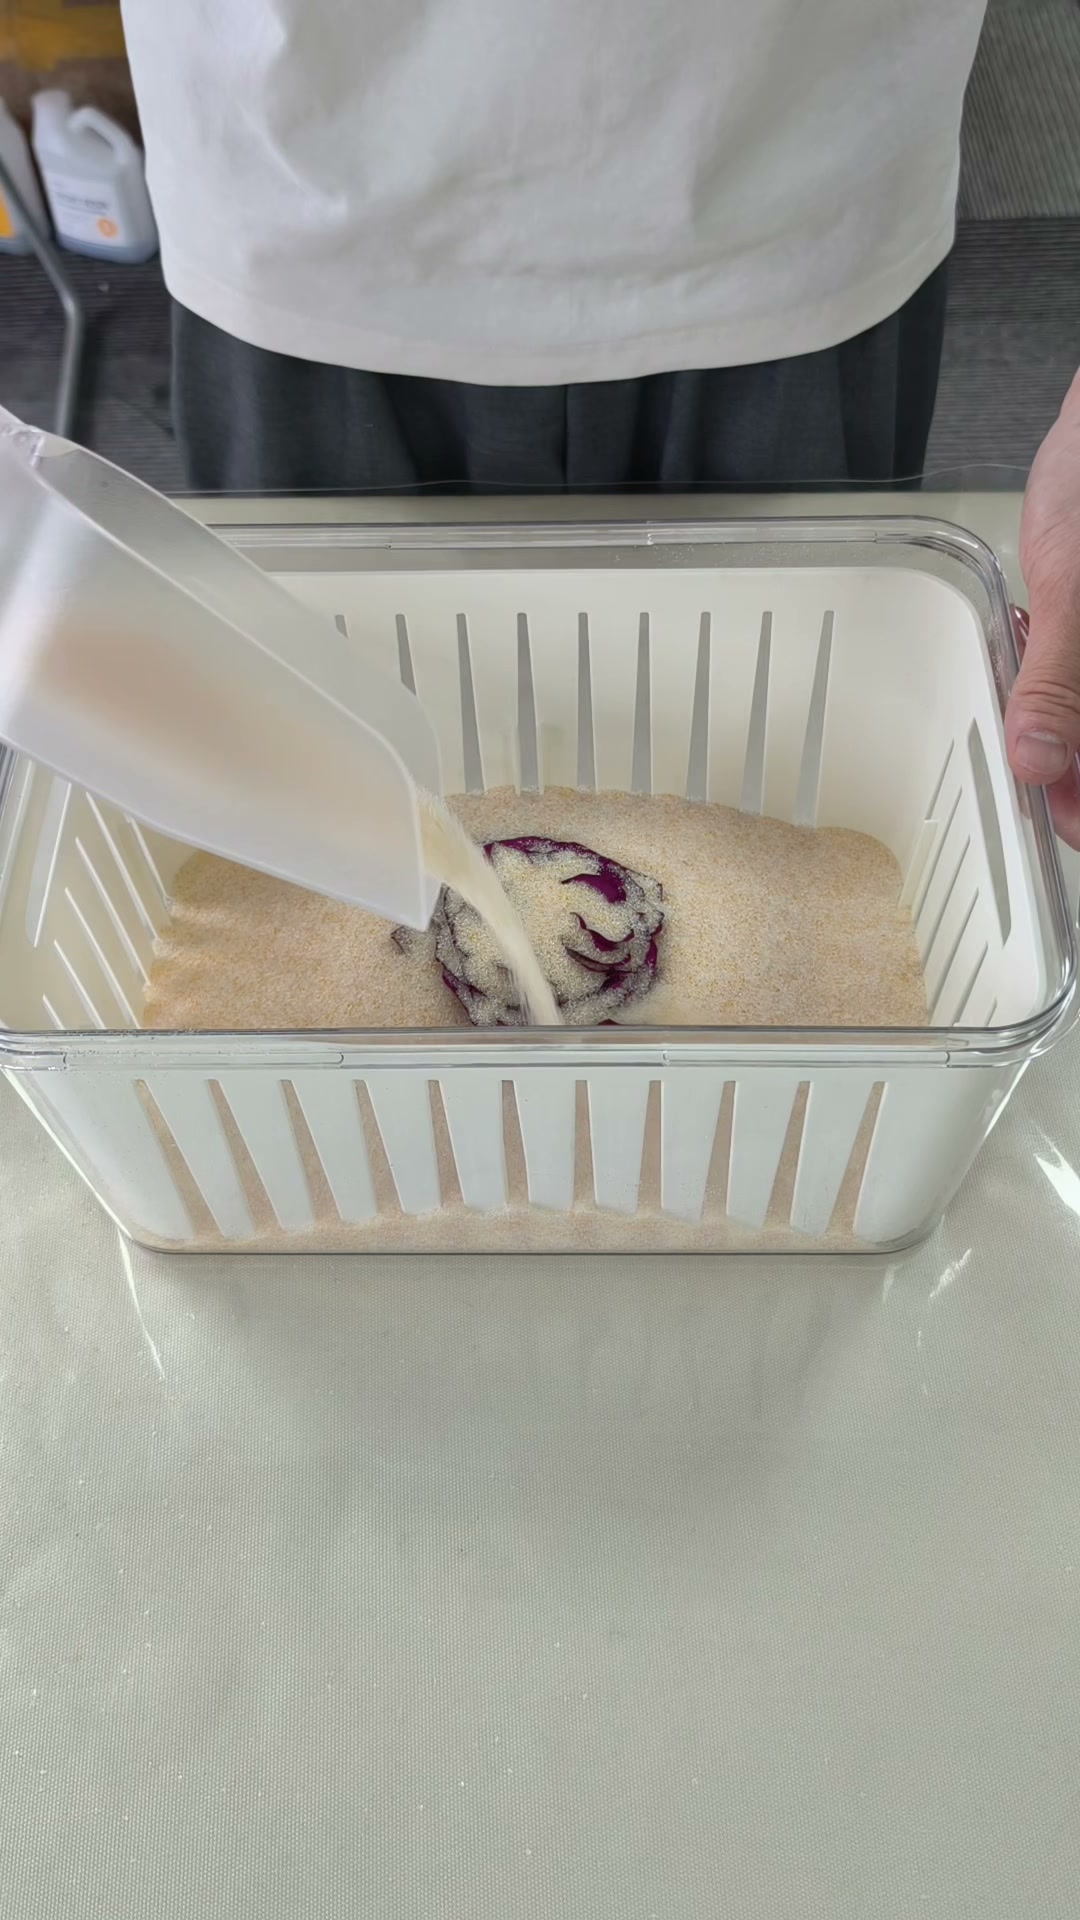
Before the final top-up, check:
- The bloom has not rolled to one side.
- Outer petals are still in the shape you want.
- No petal is trapped sharply against the container wall.
- The flower center is not flattened by a heavy pile of crystals.
- The top surface is reasonably even before the lid goes on.
If one side looks low, add a little silica gel there first. If one side looks overloaded, stop pouring on that side and let the next pass support the opposite side.
Common Mistakes To Avoid
Avoid pouring from too high. It makes the stream harder to control and can hit the petals with more force.
Avoid filling only one side. The flower can lean or twist as the silica gel rises unevenly.
Avoid packing the center first. Many flowers need support from the outside before the center can be lightly covered.
Avoid pressing the crystals down with your fingers. Gentle settling is fine, but pressing can flatten petals and create marks.
Avoid rushing the final cover. Once the flower is mostly covered, use lighter pours so the last visible petals are not forced out of shape.
When To Stop Pouring
Stop when the flower is fully covered and the top surface is even enough that the lid can close without touching the bloom. The lid should not press down on the silica gel mound or the flower.
If the container is too shallow, do not force the lid shut. Move the flower to a deeper container or use a smaller bloom. A tight lid pressing against the top layer can transfer pressure to the petals below.
For product-specific indicator and recharge wording, follow the official Wisedry instructions: Wisedry Flower Drying Crystals Instructions: Dry & Recharge. Wisedry flower drying crystals use a color indicator, and the official recharge guide explains when and how to recharge them.
After The Flower Is Dry
When the flower is ready to remove, work just as slowly in reverse. Pour or spoon away the top layer first, then uncover the sides before lifting the flower. Pulling the bloom out while crystals are still packed around it can bend petals.
For a start-to-finish check of pressure points during setup, covering, closure, checks, and removal, review Flower Drying Silica Gel Mistakes That Can Damage Petals.
After removal, store dried flowers in a dry, protected place until you are ready to use them. For that next step, see: How To Store Dried Flowers After Using Silica Gel
FAQ
Should I pour silica gel directly into the flower center?
Not at the beginning. Start around the outside and sides first. Once the flower has support, you can use a very light stream for larger gaps near the center if the bloom needs it.
Can I use a large scoop for the whole process?
You can use a large scoop for filling the base or open areas, but switch to a smaller tool near delicate petals. A narrow stream gives you more control.
What if a petal folds while I am pouring?
Stop pouring on that spot. Add a little silica gel beside or under the area that needs support, then continue more slowly. Do not press the petal flat to correct it.
Do all flowers need silica gel between every petal?
No. Tight blooms may need only light support near natural openings. Very open blooms may need more careful filling between layers. Follow the shape of the flower instead of forcing a fixed rule.
Where can I get flower drying silica gel?
You can review Wisedry flower drying silica gel crystals here: Wisedry Silica Gel Crystals. To buy or compare current Wisedry options, visit Shop Wisedry flower drying silica gel. If you are unsure about setup or recharge steps, use the Wisedry Support page.