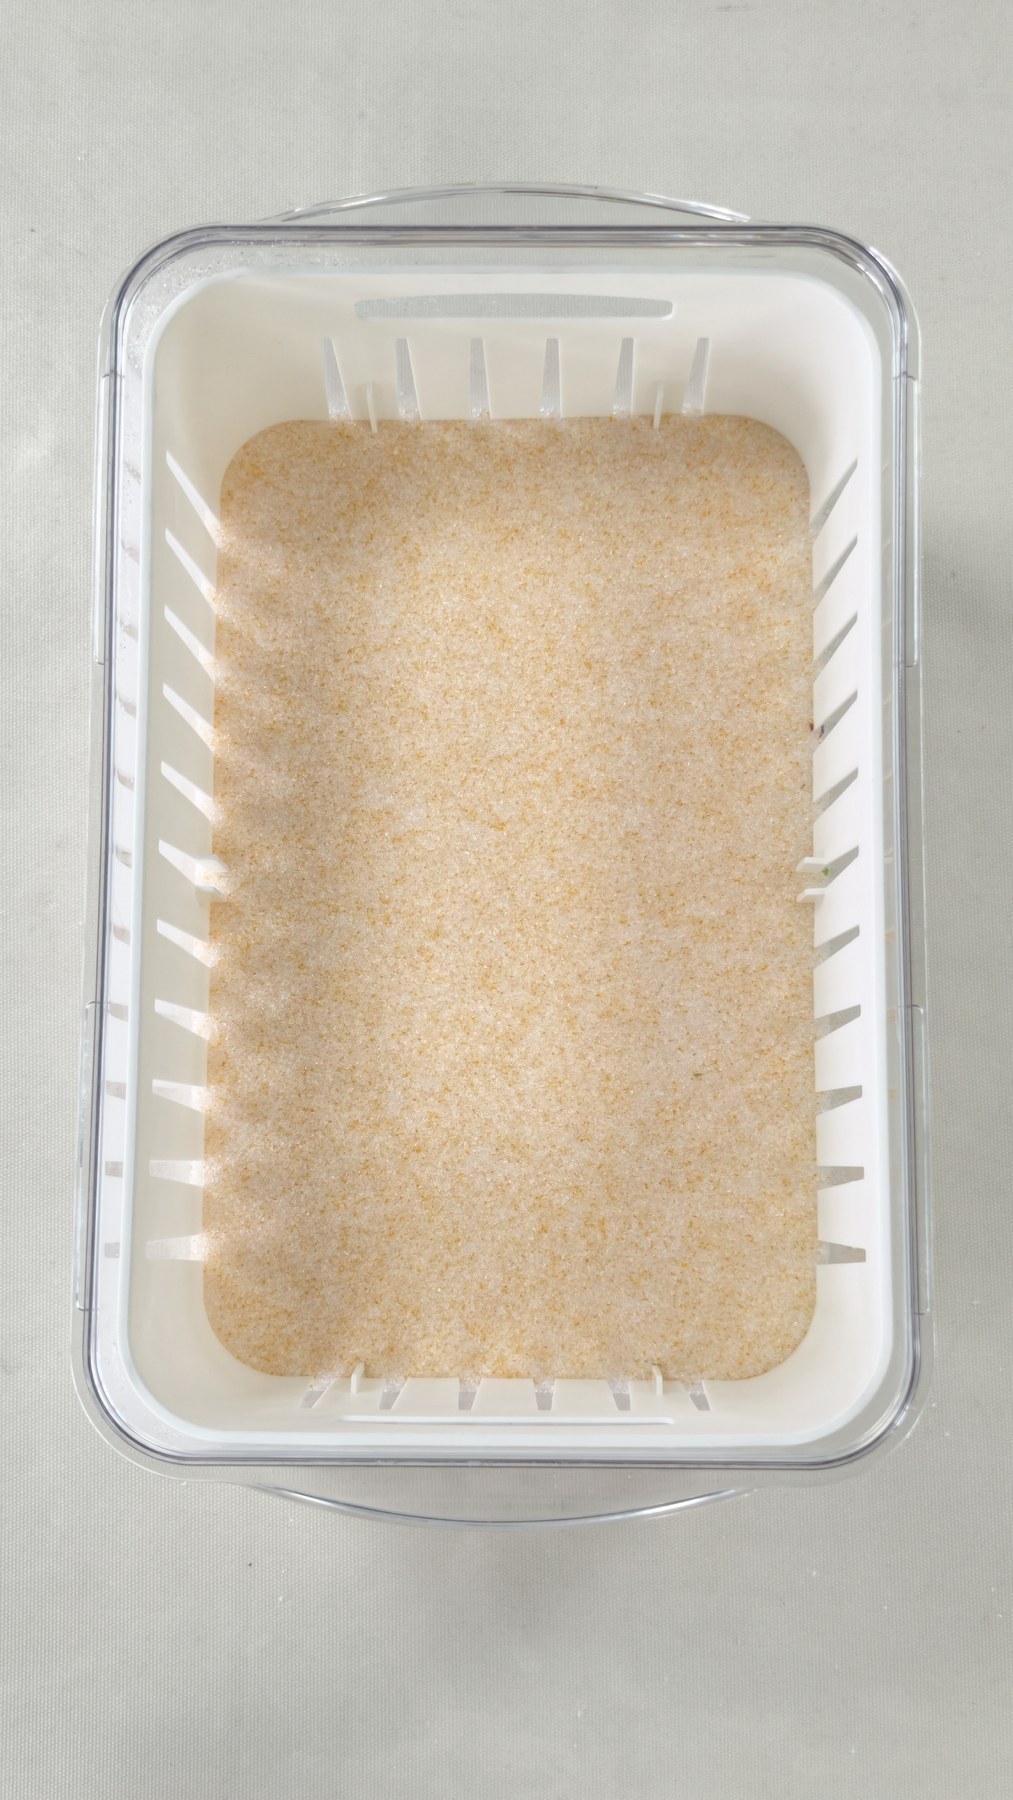
The silica gel base layer is the first part of a flower drying setup that most beginners rush. It looks simple: pour some crystals into a container, set the flower on top, and cover it. But that first layer decides whether the flower is supported evenly, whether the stem sits at a workable angle, and whether the petals are protected while you pour the rest of the crystals.
There is no single depth that fits every flower. A thin, flat bloom needs a different setup from a rose, a daisy, a small bouquet piece, or a long stem. The useful rule is to build a base layer deep enough to hold the flower steady without burying it so deeply that the container becomes hard to fill gently.
Quick Answer
For flower drying with loose silica gel crystals, start with a clean, dry, airtight container and pour a base layer that can hold the flower in its intended position. Small flat flowers may need only a shallow layer. Deeper or heavier blooms usually need enough silica gel to cradle the head and stabilize the stem before you pour crystals around the petals.
The base layer should do three jobs:
- Keep the flower from touching the hard bottom of the container.
- Hold the flower steady while you add more crystals.
- Leave enough container depth to cover the flower fully without pressing the lid against it.
If you are using Wisedry flower drying silica gel crystals, follow the product instructions for drying and recharging. Recharge the crystals when the indicator shows they need it, instead of starting a new batch with tired or saturated crystals.
Why The Base Layer Matters
Silica gel dries flowers by surrounding them with dry crystals that absorb moisture. The crystals also act as physical support. When the bottom layer is too thin, the flower can rest against the container floor, tilt suddenly, or flatten under its own weight. When the bottom layer is too deep, you may waste container space and make it harder to pour around the flower without shifting it.
A good base layer gives you control before the most delicate step: covering petals and flower centers. It lets you slow down, adjust the angle, and support fragile parts before the flower is fully buried.
This is especially useful for:
- Roses, ranunculus, peonies, camellias, and layered blooms.
- Flowers with heavy centers.
- Flowers with trimmed stems that need to stand upright.
- Resin pieces where the final shape matters.
- Keepsake flowers that cannot easily be replaced.
Start With The Container, Not The Flower
Choose the container before deciding how much silica gel to pour. The container should be clean, dry, and able to close tightly. It also needs enough height for the base layer, the flower, and the final covering layer.
Before pouring, check four things:
- The flower can fit without touching the lid.
- There is space around the petals for crystals to flow.
- The bottom is wide enough that the bloom will not lean into the wall.
- The lid can close without pressing on the flower or pushing crystals into the petals.
If the flower barely fits, use a larger container. A tight container often forces rough pouring, and rough pouring is where petals get bent or crushed.
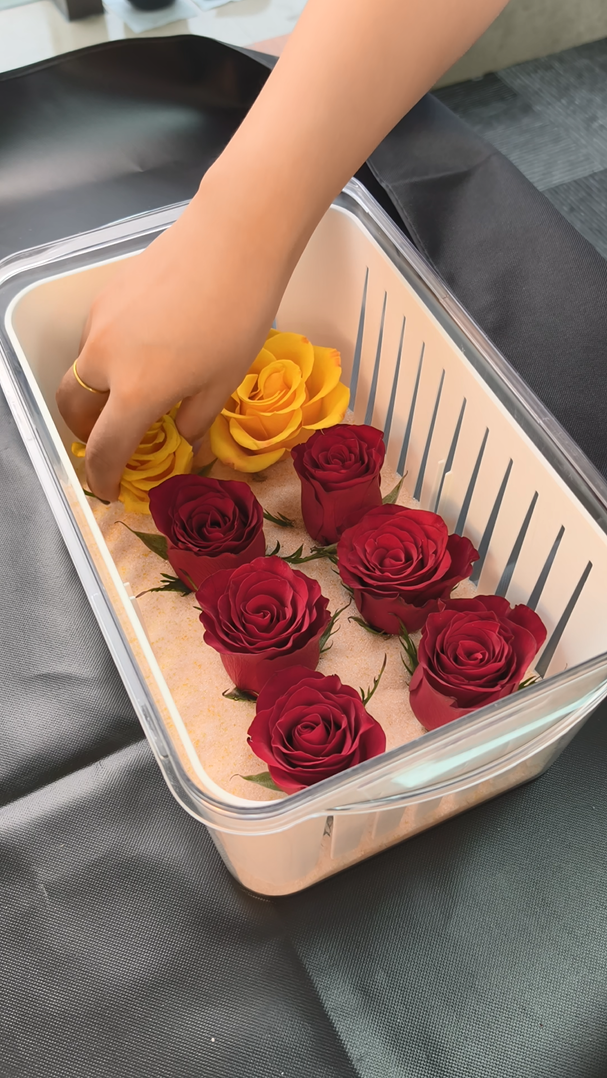
How To Judge The Base Layer Depth
Instead of measuring one fixed depth for every project, use the flower as the guide.
For flat-faced flowers, the base layer can usually be shallow because the flower may be placed face down or at a low angle. The goal is to cushion the face and keep the petals from touching the container bottom.
For upright flowers, pour enough crystals to hold the trimmed stem or base of the bloom. The flower should stand or lean gently without your hand holding it the entire time.
For round or layered blooms, build a slightly deeper support bed so the flower head has a stable pocket. You are not trying to pack the flower in tightly. You are creating a soft, even surface that keeps the bloom steady while you pour around it.
For long flowers or stems, laying the flower sideways may work better than forcing it upright. In that case, the base layer should support the length of the flower so one heavy section does not sink lower than the rest.
Step-By-Step Base Layer Setup
1. Dry And Inspect The Container
Start with a container that is fully dry. Moisture in the container works against the silica gel and can shorten the useful drying window. If the container was washed, let it dry completely before adding crystals.
Remove dust, loose plant material, fragrance residue, or anything that could transfer to the flowers.
2. Pour A Level Starting Layer
Pour the first layer slowly. Tap the container lightly or tilt it gently so the crystals settle into an even surface. Avoid packing the crystals down hard. A compacted layer is less forgiving when you place delicate blooms.
The surface does not need to be perfectly flat, but it should not have steep ridges that tip the flower.
3. Make A Small Nest For Deeper Blooms
For roses and other layered blooms, use a spoon, scoop, or your fingers to make a shallow pocket in the base layer. This lets the lower part of the flower sit securely while the petals remain open enough for crystals to flow around them.
Do not dig a deep hole and force the flower into it. The flower should be supported, not squeezed.
4. Place The Flower Gently
Lower the flower onto the base layer instead of dropping it. Check the angle before adding more crystals. If the bloom leans sharply, add or remove a small amount of silica gel under one side until it feels stable.
For mixed flowers, dry similar sizes together when possible. A tiny bloom and a large rose often need different support and covering patterns.
5. Pour Around The Base First
Before covering the top of the flower, pour a small amount of silica gel around the base. This locks in the position and reduces shifting when you add more crystals.
Use a small cup or scoop for better control. A heavy pour from a large bag can bend petals or push the flower sideways.
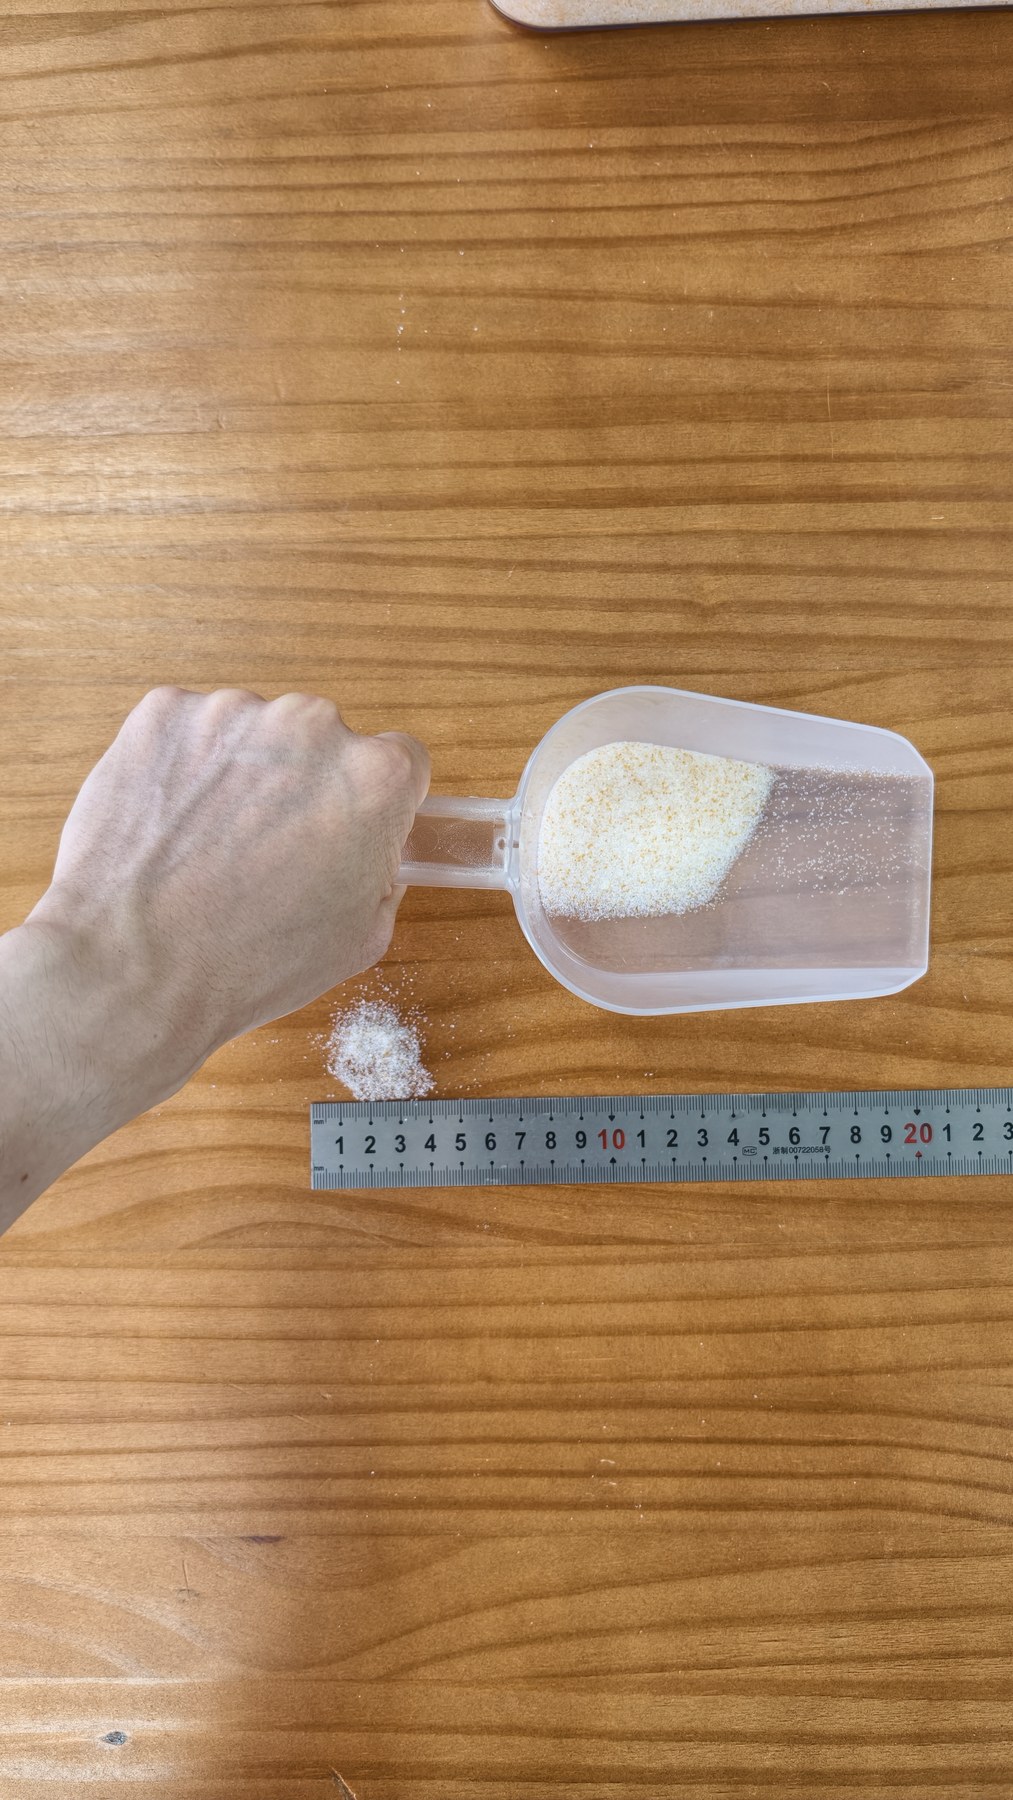
6. Cover Petals Slowly
Once the base is stable, sprinkle crystals around the petals and into open spaces. Work from the outside toward the center. Let the crystals flow between petals instead of pressing them down.
The flower should be fully supported and covered before the container is sealed. If petals are still exposed, those areas may dry differently from the rest of the bloom.
7. Seal The Container
Close the container after the flower is covered. Store it in a dry place where it will not be bumped, tilted, opened repeatedly, or exposed to damp air.
If the crystals are already showing signs of saturation, recharge them according to the Wisedry flower drying crystal instructions before relying on them for another batch.
Common Base Layer Mistakes
Using No Cushion At The Bottom
Placing a flower directly on the container floor can flatten petals or create a hard pressure point. Even a shallow cushion helps protect shape.
Starting With A Container That Is Too Shallow
If the lid presses against the crystals or flower, the setup is too tight. Choose a taller container rather than pushing the flower down.
Pouring Too Fast
Fast pouring can move the flower before it is supported. It can also force crystals into petals with more pressure than needed. Slow pouring gives you more control.
Mixing Flowers That Need Different Support
Large blooms, thin petals, and small filler flowers do not always dry best in the same layer. If a flower is very delicate or important, give it its own container or its own protected area.
Reusing Saturated Crystals Without Checking
Flower drying crystals need to be active. If Wisedry crystals have shifted from orange toward dark green, follow the recharge guide before the next drying project.
Need fresh crystals for a new batch? Shop flower drying silica gel.
How Much Empty Space Should You Leave?
Leave enough room above the flower for a complete covering layer and the lid. The lid should close normally. It should not press down on the crystals, flower head, or stem.
A simple precheck helps:
- Place the flower in the empty container first.
- Estimate the base layer needed to lift and support it.
- Confirm there is still room to cover the highest petals.
- Switch containers if the lid clearance looks tight.
This is better than trying to save silica gel by squeezing a tall flower into a shallow box.
What To Do After Drying
When the drying period is complete according to your product instructions and flower condition, open the container carefully. Do not pull the flower straight through packed crystals. Move crystals away slowly, support the flower, and lift it with minimal pressure.
After removal, inspect the flower before display, resin work, or storage. If you are not using it immediately, follow a dry storage routine. See Wisedry’s guide to store dried flowers after silica gel drying for airtight storage, gentle handling, and humidity-control steps after drying.
FAQ
Can The Silica Gel Base Layer Be Too Deep?
Yes. A base layer that is much deeper than needed can waste container height and make it harder to cover the flower gently. Use enough to support the flower, then save the remaining container space for the covering layer.
Should Flowers Stand Upright Or Lay Sideways?
It depends on the flower shape and container. Some trimmed flowers stand well in a deeper base layer. Flat-faced flowers may work better face down, while longer stems may dry more naturally on their side. Follow the product instructions and choose the position that avoids crushing or bending.
Should I Press The Flower Into The Silica Gel?
No. Set the flower gently into the base layer. If it does not stay in place, adjust the layer or container instead of pressing the petals down.
Do I Need To Cover The Flower Completely?
Yes, the flower should be surrounded and covered by crystals for even support during the drying process. Pour slowly so the crystals settle around petals instead of flattening them.
Can I Reuse The Same Flower Drying Crystals?
Wisedry flower drying crystals are reusable when recharged according to the product instructions. Recharge them when the color indicator shows they need it or when drying performance slows.
Final Takeaway
The right silica gel base layer is not a fixed measurement. It is the layer that cushions the flower, holds it steady, and leaves enough room to cover the petals fully. Start with a clean airtight container, pour a stable base, position the flower gently, then add crystals slowly around the base and petals.
For more product-specific help, use the Wisedry flower drying crystal instructions, download the flower drying guide for resin artists, or contact Wisedry support.